Sysprepping a customized image on a VM

Don't forget you can select the Dual architecture option from Unattended's Toolbar, and make it universal.
Thanks
This is a custom and slim autounattend.xml file, also the boot.wim is slim: Win 8 142 MB - Win 11 239 MB, could be more but I'm ok with that .

Once I have slimmed down the image, I do some more to remove the winsxs crap but keep Windows update for drivers and activation, 2 folders Related to Edge are removed (800 MB+), the browser runs ok but still some programs try to open links with it.

I´m not sure but if I have seen it correct, nuhi keeps in NTLite Edge update as needed for Edge but Edge folder have all the exact same folders and files content as the other 2 folders and some more.

I have built a file that is set from autounattend file to download the sound volume to 2 every time windows starts, a file that runs in pre-oobe setup and makes more stuff, also (in the last week) set in autounattended to disable startupsound, that works from 8 up to 11 (not tested in 7).

Having 2 files is less to read and check, just made a copy from 1 to another and replaced amd64/x86.

I have set a file that detects the administrator built-in name (starting from Windows 10, it is localized), activate and rename (Win 10 & 11) to whatever I want, it works at least starting Windows 7 up to Windows 11.

I'm not sure if I will find out how to disable oem bios string detection as starting from Windows 10, it disables the oobe and setupcomplete execution, probably there is an undocumented workaround, not only RunSynchronous at specialize stage or RunOnceEx.
 
I'm not sure if I will find out how to disable oem bios string detection as starting from Windows 10, it disables the oobe and setupcomplete execution, probably there is an undocumented workaround, not only RunSynchronous at specialize stage or RunOnceEx.
Workaround is to enable OEM SetupComplete, which bypasses the normal post-OOBE reg key (to run SetupComplete) with a RunSynchronous call inside specialize pass. They're almost identical, except OEM SetupComplete runs before OOBE instead of after.

This will impact Appx user provisioning, since user profiles don't exist until after OOBE.
 
They're almost identical, except OEM SetupComplete runs before OOBE instead of after.
Not really, some cmd commands or standalone programs without dependencies will run at a very early stage, as some services won't start before oobe, needed for some program install or some windows utilities.
This will impact Appx user provisioning, since user profiles don't exist until after OOBE.
The same as above, but at this stage, "System" user profile is running
 
Mount the images (all editions in all .wim's)
Find the unattended.xml and remove them all.
In the root folder (the folder containing the folder called sources), check the autounattend.xml and that there is not any unattend.xml inside the iso or flash drive (if working with).

Other mistake that I had earlier was using an xml for the wrong architecture but that shouldn't be your case if creating a new with NTLite.

I always copy a prebuilt autounattend.xml file to the root folder.
If you want to try interating a reg file to disable pages instead:

Don´t know if the xml overwrite this but it works if this information is not set in any custom unattended xml setup file.
Code:
REGEDIT4

[HKEY_LOCAL_MACHINE\SOFTWARE\Microsoft\Windows\CurrentVersion\OOBE]
"HideOnlineAccountScreens"=dword:00000001
"HideEULAPage"=dword:00000001
"SkipMachineOOBE"=dword:00000001
"HideWirelessSetupInOOBE"=dword:00000001
"NetworkLocation"="Home"
"ProtectYourPC"=dword:00000003
"SkipUserOOBE"=dword:00000001
"HideLocalAccountScreen"=dword:00000001
I found an unattend.xml in Windows/Panther inside the WIM when I opened WIM with PowerISO. However I couldn't remove it, there was no such option
 
I found an unattend.xml in Windows/Panther inside the WIM when I opened WIM with PowerISO. However I couldn't remove it, there was no such option
Mount the image with NTLite and explore it, if you still can't delete, use an explorer running as trusted installer.
 
Mount the image with NTLite and explore it, if you still can't delete, use an explorer running as trusted installer.
Okay I fixed the biggest problem. The problem ended up being that I was supposed to mount the sysprep'd install.WIM file in NTLite and uncheck the 'install to image' checkbox in Unattended, it was checked by default, dunno why. Then I just used my custom Unattended settings and saved in 'Apply'. Then put that install.wim in the original Windows.ISO and deleted install.esd.

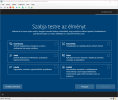
Now the only problem remaining is: Even tho the 'ProtectYourPC' is set to '3' ie 'DO NOT APPEAR/turned off', it does appear right after the system asks me to create an online or offline account. Why is this?

1661903802673.png

This is what I mean. Isn't this the ProtectYourPC part? I have it set to '3' so 'off' so why am I getting this? It says stuff like Customize Your Experience, Entertainment, Games, School, Creativity, Business, Family
 
Last edited:
Check ALL the locations for duplicate answer files.

Implicit Answer File Search Order
Search Order​
Location​
Description​
1​
Registry
HKEY_LOCAL_MACHINE\System\Setup\UnattendFile​
Specifies a pointer in the registry to an answer file. The answer file is not required to be named Unattend.xml.​
2​
%WINDIR%\Panther\Unattend​
The name of the answer file must be either Unattend.xml or Autounattend.xml.
Note
Windows Setup searches this directory only on downlevel installations. If Windows Setup starts from Windows PE, the %WINDIR%\Panther\Unattend directory is not searched.
3​
%WINDIR%\Panther​
Windows Setup caches answer files to this location for use in subsequent stages of installation. For example, when a computer reboots, Setup can continue to apply the settings in an answer file. If you explicitly specify an answer file by using Windows Setup or Sysprep, the answer file cached to this directory is overwritten with the explicitly specified answer file.
Important
Do not use, modify, or overwrite the answer file in this directory. The answer file in this directory is annotated by Windows Setup during installation. This answer file cannot be reused in Windows SIM or any other Windows installations.
4​
Removable read/write media in order of drive letter, at the root of the drive.​
Removable read/write media in order of drive letter, at the root of the drive.
The name of the answer file must be Autounattend.xml, and the answer file must be located at the root of the drive.​
5​
Removable read-only media in order of drive letter, at the root of the drive.​
Removable read-only media in order of drive letter, at the root of the drive.
The name of the answer file must be Autounattend.xml, and must be located at the root of the drive.​
6​
windowsPE and offlineServicing configuration passes:
  • \Sources directory in a Windows distribution
All other passes:
  • %WINDIR%\System32\Sysprep
In the windowsPE and offlineServicing configuration passes, the name of the answer file must be Autounattend.xml.
For all other configuration passes, the file name must be Unattend.xml.​
7​
%SYSTEMDRIVE%​
The answer file name must be Unattend.xml or Autounattend.xml​
8​
Drive from where Windows Setup (setup.exe) is running, at the root of the drive.​
The name of the answer file must be Unattend.xml or Autounattend.xml, and must be located at the root of the Windows Setup folder path.​
 
Check ALL the locations for duplicate answer files.

Implicit Answer File Search Order
Search Order​
Location​
Description​
1​
Registry
HKEY_LOCAL_MACHINE\System\Setup\UnattendFile​
Specifies a pointer in the registry to an answer file. The answer file is not required to be named Unattend.xml.​
2​
%WINDIR%\Panther\Unattend​
The name of the answer file must be either Unattend.xml or Autounattend.xml.
Note
Windows Setup searches this directory only on downlevel installations. If Windows Setup starts from Windows PE, the %WINDIR%\Panther\Unattend directory is not searched.​
3​
%WINDIR%\Panther​
Windows Setup caches answer files to this location for use in subsequent stages of installation. For example, when a computer reboots, Setup can continue to apply the settings in an answer file. If you explicitly specify an answer file by using Windows Setup or Sysprep, the answer file cached to this directory is overwritten with the explicitly specified answer file.
Important
Do not use, modify, or overwrite the answer file in this directory. The answer file in this directory is annotated by Windows Setup during installation. This answer file cannot be reused in Windows SIM or any other Windows installations.​
4​
Removable read/write media in order of drive letter, at the root of the drive.​
Removable read/write media in order of drive letter, at the root of the drive.
The name of the answer file must be Autounattend.xml, and the answer file must be located at the root of the drive.​
5​
Removable read-only media in order of drive letter, at the root of the drive.​
Removable read-only media in order of drive letter, at the root of the drive.
The name of the answer file must be Autounattend.xml, and must be located at the root of the drive.​
6​
windowsPE and offlineServicing configuration passes:​
  • \Sources directory in a Windows distribution

All other passes:​
  • %WINDIR%\System32\Sysprep
In the windowsPE and offlineServicing configuration passes, the name of the answer file must be Autounattend.xml.
For all other configuration passes, the file name must be Unattend.xml.​
7​
%SYSTEMDRIVE%​
The answer file name must be Unattend.xml or Autounattend.xml​
8​
Drive from where Windows Setup (setup.exe) is running, at the root of the drive.​
The name of the answer file must be Unattend.xml or Autounattend.xml, and must be located at the root of the Windows Setup folder path.​
Okay this is crazy but I am posting this comment to give an update:

There never was any problem other than having to uncheck the 'Install to Image' checkbox within the .WIM file after mounting it in NTLite. No registry editor required either. That was the only problem, really. After that I just used the settings that I normally use in the Unattended section and saved the .WIM file, thereafter I just injected it into the original Windows.iso's 'Sources' folder and injected the unattended.xml and autosaved.xml files into the root of the windows.iso. Done, problem solved.

1 problem that I remain to have is: I set both the 'HideLocalAccountScreen' and the 'HideOnlineAccountScreen' settings to 'false', as well as the 'SkipMachineOOBE' and 'SkipUserOOBE' settings. So all these 4 were set to 'False. However, I am only prompted to create a local account, not an online account. Even tho I set them 'both' to false. Why is this?

Most likely not a problem albeit very interesting find to me is this: When I boot into the same windows.iso on a VM, I am brought to the 'Who's going to be using this machine? Organization or Private?' screen. And after that, I am prompted to create an online account. On a physical machine, however, I am never asked the 'Who's going to be using the machine' question! And I am only asked to create a local account, not an online account.

Why is this?
 
Well you have to create at least 1 account, I imagine Microsoft was smart enough to force this, and so if both accounts are set to false, it ignores you and requires at least a local account anyway, otherwise how do you boot to the desktop?

I think we also addressed the account stuff earlier too. If you don't have an active internet connection than it will default to local account and not force online. Are you specifically wanting it to just create a local account for you, rather than typing it in yourself, is that what you mean?
 
Last edited:
Well you have to create at least 1 account, I imagine Microsoft was smart enough to force this, and so if both accounts are set to false, it ignores you and requires at least a local account anyway, otherwise how do you boot to the desktop?

I think we also addressed the account stuff earlier too. If you don't have an active internet connection than it will default to local account and not force online.

Are you specifically wanting it to just create a local account for you, rather than typing it in yourself, is that what you mean?
Understood thank you, but what about the 'Who's going to be using this device: user or organization?'? What triggers that? I only see that in the VM, not on a physical machine
 
I'm not sure since I don't use VM, but it may be detecting your active connection from the container OS that you are using to run the VM inside, thus triggering the prompt. If that's not the case, it could also be as simple as that's just the default and expected behavior of a VM. Someone versed in VM will have to comment for us to know for sure though.

This is another example of what Garlin and I have been repeating though. You're combining too many layers at once. You've got at least VM, Sysprep, and Autounattend all being tackled simultaneously. You need to do them layer by layer as separate images, in order to learn each of their quirks first, and gain this knowledge of which layers are responsible for what. When you tackle everything all at once it's just creating unnecessary work and making it more difficult to troubleshoot.
 
Last edited:
Well you have to create at least 1 account, I imagine Microsoft was smart enough to force this, and so if both accounts are set to false, it ignores you and requires at least a local account anyway, otherwise how do you boot to the desktop?
That's not true. You can enable the built-in Administrator account for logon.
While MS discourages this practice, it's still allowed. Anyone who does this on a production system should be fired.
 
Fair enough, I was going to mention the defaultuser0 thing, but thought it best not to complicate things though :p
 
Fair enough, I was going to mention the defaultuser0 thing, but thought it best not to complicate things though :p
You started it. defaultuser0 is a temporary user account for Windows' private use while setting up OOBE. When OOBE is done, it should disappear before the first user logon. If it's still around, you've messed something bad.
 
You started it. defaultuser0 is a temporary user account for Windows' private use while setting up OOBE. When OOBE is done, it should disappear before the first user logon. If it's still around, you've messed something bad.
What is the reason why usually?
 
You started it. defaultuser0 is a temporary user account for Windows' private use while setting up OOBE. When OOBE is done, it should disappear before the first user logon. If it's still around, you've messed something bad.
I admit I was incorrect, I was trying to overly simplify things, and in the process made some mistakes. Apologies if this caused confusion to any readers.
 
defaultuser0 is created due to an error on user creation, most users (if not all) have seen this error on non english windows, never used windows 8 but probably started there, trying to enable the admin account.
 
defaultuser0 is created due to an error on user creation, most users (if not all) have seen this error on non english windows, never used windows 8 but probably started there, trying to enable the admin account.
Do you have a source on this?
 
Do you have a source on this?
Here:
@Windows 10 User, then it's normal, I've seen defaultuser0 on non-English non-edited Windows as well.
Let me know if you don't see the same.
And here:
yes, after a little bit of googling, I came to know that this bug is there since 2016, & strange enough, no one knows why MSFT didn't patch this up in last four years, in & with 8 different Windows 10 version update released since 2016
And here too:
I only saw this happen in version 1607. From version 1809 onwards I cannot reproduce this problem here on clean installations. I haven't tested the builds between 1607 and 1809 so I don't know what build exactly that was fixed in.

Also, you can do a search for defaultuser0 here in the forums.
Doing some google search, Windows 11 have this "bug".
 
Back
Top