Weird duplicate services?

nroth

New Member
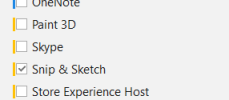
I'm very new to using NTLite. In order to learn how everything works, I grabbed a preset and tried my hand at modifying it. For example, the preset disabled snip&sketch, which I would want active. So I re-enabled the component. NTLite told me that I needed to re-enable the related CaptureService too, and so I did.

Upon doing a test install of the image I made, snip&sketch isn't working. But here's where it gets weird.

The first thing I did was to check the services console whether CaptureService was running. It was set to manual and not currently running, which is weird because it should start itself if called on by an app that needs it, but well, I went and started it by hand. But snip&ksetch still didn't work even then.

What's more - when I opened the task manager and looked at the active services, I noticed that there was a "CaptureService" listed as deactivated, and alongside it, a "CaptureService_36bbb" that was running. Looking again at the services console where I had started the service earlier, and expanding the columns enough to see the full names, it is listed there as "CaptureService_36bbb" too. And the normal "CaptureService" that task manager claims exists but is deactivated - that's not visible at all in the services console.

Multiple other services in the services console also have "_36bbb" appended to their name.

Does anyone know where this comes from, and how to fix it? It's probably something I did wrong, I just don't know what.
 
Last edited:
nroth Services like "CaptureService_36bbb" are normal(on w10 upwards), "_36bbb" changes at every logonstartup so you cant write a reg file to disable them and you cant disable them from services.msc, thats why i call them "bastard services" :mad::mad::mad:, you have to go into the registry to change them.

I dont think ntlite can change them, garlin nuhi will know.
 
Last edited:
I don't want to disable the service - I want it running! :p

But well, if everything is in order with this service, then I'm puzzled why snip&sketch isn't working. It's right there in the start menu, but clicking it does nothing at all, and neither does using the win+shift+s shortcut. The component is definitely enabled in the image.
 
Here it is - thank you for your assistance :)
What is your physique? If you have KB5028185 (build 22621.1992) or KB5029263 (build 22621.2134), there are problems with this service in these builds, it does not start, these problematic builds should not be installed in them with an overflow of the svchost buffer when you click PrtScn screenshot. On windows 10, rather the same thing.
 
I used a regular Windows 10 22H2 image together with the recommended Windows Updates found by NTLite. I don't know what build that corresponds to.
 
There are two kinds of Windows services:
- Normal system-wide services, when there is only one service (or group) for the entire system.
- Per-user services in Windows

UWP desktop services are dynamically started for each logged on user, for security reasons. If two users are both logged on, you can't have them sharing the same clipboard (Capture) service for privacy. They each get their own private Capture service process.

When user accounts are provisioned, Windows assigns each profile an unique hash value.

Every time you need a per-user service, the persistent hash is appended to the service name. This is normal, and transparent to your desktop session. All of your per-user services will stop when your logon session ends.
 
For Snip&skecth to work, you've to keep Capture Picker in Components - Windows Apps - System Apps + Capture Service too in Multimedia section.
Both is unchecked in your preset.
 
...Okay, I spent a good long while being really confused, because my GUI clearly showed these components as active, but the XML file also clearly listed them for removal. But I managed to figure it out.

Turns out, I unknowingly uploaded the wrong XML file. I once, at the start, saved this preset under My Documents, then continued to work from it the next day, innocently believing that if I saved my changes, they would be written to that specific file. But they weren't. There's apparently a presets subfolder in the NTLite directory, and the most up to date preset is in there. The program never wrote changes back to the file I had saved elsewhere, but rather produced a duplicate internally.

So now I am not actually sure anymore if the image I did the test install with had every change I wanted in the first place.

Nothing for it but to try again, then. Let's see how it goes this time.
 
Unless you disabled it in settings, NTLite will always create an Auto-Saved file in the Preset and ISO folders after you hit Apply.
 
NTL looks for your preset in folder \NTLite\ Presets when you load it.
When start run your preset on Apply tab an Auto-xxxxxxxxxxxx preset will be generated (backup) and can be renamed to your prefer.
Actually you can run your "master" preset on following "lited" images i.e. on sysprepped or want to add a Clean Update Backup in a second run after updates and done removals to shrink your install image further.
 
Nothing for it but to try again, then. Let's see how it goes this time.
There is a lot of trial and error in the game.

Actually you can run your "master" preset on following "lited" images i.e. on sysprepped or want to add a Clean Update Backup in a second run after updates and done removals to shrink your install image further.
NTLite works very well on sysprepped/captured images, everything is fully baked in, nothing staged.
 
NTLite works very well on sysprepped/captured images, everything is fully baked in, nothing staged.
The point was to inform that add Clean Update Backup in first run don't shrink anything as it's run first when Apply on a loaded image (Nuhi changed that earlier and don't remember why).
Make a second run of a socalled "Master" preset include Clean Update Backup check will do the job and shrink the install image significantly.
 
Ive seen people using the 2 pass method here, i prefer a single pass on a captured image, less points where something can go wrong.
 
I do the shrink on the Sysprep + remove the Indexing on C:\ drive as my other drives are already de-Indexed.
Everything is far more faster than Windows Search.
1693418333600.png
 
In the goood old days - where XP make a footprint of 360 mb on the harddisk and take about an hour to install - hehe.
 
Alright, second test install: snip&sketch works!

...and in return there's no network adapter of any sort. Which is odd, because the first test install connected to LAN just fine, and I don't remember touching any network settings?

Trial and error, indeed :p
 
Back
Top