You are using an out of date browser. It may not display this or other websites correctly.
You should upgrade or use an alternative browser.
You should upgrade or use an alternative browser.
Win 8.1 AIO ISO is using Win10 Setup file
- Thread starter dondon
- Start date
Kasual
Well-Known Member
I have updated 8.1 x86 and is the common ui and text.Hi all,
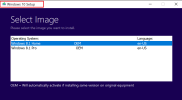
I have a Windows 8.1 32/64bit ISO which seems to work but when I run the setup.exe, it shows "Windows 10 setup" so it seems to be using the Windows 10 installer. Would it possible to edit that to show "Windows 8.1 Setup" for example?
Thanks for any suggestions
Seems like you are using a modified source, as the ui isn't white but the Win 10 setup with the 8.1 install.wim.
I wanted to create a ISO for Win 8.1 which could be used to install both 32 and 64bit versions. Just like you can download one for Win 10 using Microsoft media creation tool. I used AIO Pro but it didn't work. So I downloaded this Win8.1 ISO from online, it looks like the person who created it used the Win 10 setup for some reason. Maybe because that's the only way to combine both 32 & 64bit versions
Is there a way to achieve this?
Thanks for the replies
Is there a way to achieve this?
Thanks for the replies
For NTLite forum, we don't support modified ISO's downloaded from the web. NTLite is about updating original Windows ISO images yourself, since you don't know what's inside other people's images. Many users have created dual-architecture ISO's on this forum.
Use the search function to see previous threads.
Use the search function to see previous threads.
Kasual
Well-Known Member
I think you can do it with NTLite having extracted the x86 and x64 sources you can try:I wanted to create a ISO for Win 8.1 which could be used to install both 32 and 64bit versions.
Is there a way to achieve this?
Add the x64 source to NTLite
Right click to the Windows Edition and select Export - WIM
Select the install.wim located in x86 source and save it.
or do a search for
Josh Cell's WinAIO Maker Professional
Official forum support: (there is no support anymore)
Official download link Available download.
The process is about the same but you can change the edition names before using the [Save all into ISO] button.
I have tried this with WinAIO Maker Professional after downloading the original Win 8.1 32 & 64 bit ISOs using the MS media creation tool. But it didn't work. I think its something to do with creating a dual architecture ISO like other people on this thread have suggested but I'm not really sure how to go about doing that. When you burn the ISO to a USB drive with Rufus, it selects file system as NTFS instead of FAT32 unlike the ISO with dual architecture which automatically selects Fat32 file system.I think you can do it with NTLite having extracted the x86 and x64 sources you can try:
Add the x64 source to NTLite
Right click to the Windows Edition and select Export - WIM
Select the install.wim located in x86 source and save it.
or do a search for
Josh Cell's WinAIO Maker Professional
Official forum support: (there is no support anymore)
Official download link Available download.
The process is about the same but you can change the edition names before using the [Save all into ISO] button.
Thanks for the suggestion
Kasual
Well-Known Member
When you burn the ISO to a USB drive with Rufus, it selects file system as NTFS instead of FAT32 unlike the ISO with dual architecture which automatically selects Fat32 file system.
Try WinSetupFromUSB instead of rufus, that never worked for me, tried 3 years and failed, tried 2 weeks ago and didn't worked what it should do.
Hellbovine
Well-Known Member
Nuhi has a link in the blogs about this, which I imagine is relevant, though I've never done this myself so I can't say for sure:
https://www.ntlite.com/how-to-create-a-custom-image-with-multiple-editions/
https://www.ntlite.com/how-to-create-a-custom-image-with-multiple-editions/
Older Rufus versions didn't have Secure Boot support for UEFI, so NTFS would fail. Try it with the current version.
The generic instructions for AIO (32 vs 64-bit, or W7-11) in a nutshell:
1 Download all the separate ISO's, and extract them.
2. Use the x86 version of the highest Windows release as the base ISO (can't use W11).
3. For each of the other versions, move the install WIM out of the sources folder to somewhere outside the ISO folder.
4. Mount the isolated (moved) install.WIM in NTLite.
5. Select the image, right menu Export to -> the x86 base edition's install.wim. NTlite will offer you the choice of Overwrite or Append, choose Append.
6. Continue exporting images until done. Unload WIM.
7. Repeat steps for all other ISO's.
8. Finally load the base ISO, and the install.wim will have merged all the editions into one file.
9. Create a dual-architecture unattend file (licensed feature).
10. Create ei.cfg file to allow all editions to be listed.
Even with ESD compression, AIO images will be larger than FAT32's size limit (4GB). Figure out Rufus or another tool.