Hellbovine
Well-Known Member
- Messages
- 1,197
- Reaction score
- 740
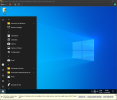
The following is a guide on how to remove the default links, shortcuts, pins, tiles, and apps from the start menu and taskbar in Windows 10, giving you a blank slate, for all users on the computer. This guide was tested on 21H2 and will work on similar versions, but it is not fully compatible with Windows 11, because that operating system uses a different start menu.
The benefit of this solution is that it will not break anything, and is a more effective approach than trying to solve it on a live install or using one of the other methods from the internet, because many of those are hacky and result in bugs or do not actually remove everything as intended.
STEP 1: XML FILES
STEP 2: INTEGRATE REGISTRY FILE
MODIFICATION SUMMARY
Visit the Gaming Lounge to find more guides like these.
The benefit of this solution is that it will not break anything, and is a more effective approach than trying to solve it on a live install or using one of the other methods from the internet, because many of those are hacky and result in bugs or do not actually remove everything as intended.
STEP 1: XML FILES
The XML files must be integrated into the image before Windows is installed. It is important to note that these are not the same kind of XML files as the NTLite templates and presets are, rather these files are special instructions that Windows reads while it is preparing the installation of the operating system, and they tell Windows to skip the steps of downloading bloat, rather than having users remove those things later.
1A) Load a Windows 10 image into NTLite.
1B) Right-click on source OS and then explore mount directory.
1C) Left-click twice in address bar and add \Users\Default\AppData\Local\Microsoft\Windows\Shell\ to the end.
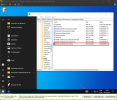
1D) Copy the tweaked DefaultLayouts.xml and LayoutModification.xml into the mounted Shell directory, and when prompted choose the option to overwrite the already existing file in that directory. If there is no file to overwrite, then it is likely that the user is not in the right location.
1E) Exit the mounted directory window.
STEP 2: INTEGRATE REGISTRY FILE
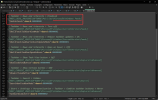
Users can tweak this registry file to remove any of the changes that do not match your personal preferences, but keep in mind that these are needed to fully experience this thread as intended. All the keys have been commented inside the file to explain what each of them do.
2A) Click "Registry" from the left menu, then "Add", choose "Registry files" and select "Clean.reg" to integrate.
2B) Go to “Apply” and then “Process” to finalize the image.
Note: Exit NTLite after processing is complete, copy and paste the newly edited files onto a USB drive, then boot into that drive to install your custom Windows! If you are not sure how to install Windows, or how to deal with drivers, check out my other guides on that topic.
MODIFICATION SUMMARY
The DefaultLayouts.xml already exists on a default operating system and during the installation of Windows this file is loaded so that it can perform the task of detecting which edition of Windows the user is installing, then it will select the preconfigured template inside that file which correlates to that edition, to setup the Start Menu and Taskbar according to how Microsoft wants each edition to appear. The customized file simply removes all templates for every edition and properly informs Windows to give the user a blank slate.
The LayoutModification.xml is an add-on file that is required to eliminate a small handful of links that are not handled by the previous. Both of these XML files have documentation on the Microsoft website, because it was intended to allow IT profressionals to customize and add their own links and such, but that really is not what most people are looking for on the internet, because most users want a blank slate instead, which is the sole purpose of this guide to provide that solution, giving users a desktop that starts to resemble the simple layout of Windows XP and 7.
The LayoutModification.xml is an add-on file that is required to eliminate a small handful of links that are not handled by the previous. Both of these XML files have documentation on the Microsoft website, because it was intended to allow IT profressionals to customize and add their own links and such, but that really is not what most people are looking for on the internet, because most users want a blank slate instead, which is the sole purpose of this guide to provide that solution, giving users a desktop that starts to resemble the simple layout of Windows XP and 7.
Visit the Gaming Lounge to find more guides like these.
Attachments
Last edited:


