You are using an out of date browser. It may not display this or other websites correctly.
You should upgrade or use an alternative browser.
You should upgrade or use an alternative browser.
Language Packs
- Thread starter Clanger
- Start date
Got the same problem. Language pack installed, not visible in setup, but I checked the lang.ini, and the 2 languages are in the .ini file.Nevermind, this was a question about language packs not visible in Setup but I realized they were missing from lang.ini
I check with my previous multilanguage build (1703), lang.ini have the same parameters....
Language selection available in 1703,
Not available in 1809....
entresting
New Member
Did you check within the boot.wim's lang.ini?
")
going to make windows RTM 1903 versions today with 1903 language packs..
EDIT...
all went well first time this time..
done it same way as i did 1809..
but with all 1903 files..
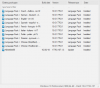
for those wanting to view the log file... integrated 37 language packs into a EN-US iso
ended up with 38 language iso image can choose what language to install from start of installation
https://www.mirrored.to/files/JMJZUG1T/NTLite_log_intergrate_1903_language_packs.log_links
EDIT...
all went well first time this time..
done it same way as i did 1809..
but with all 1903 files..
for those wanting to view the log file... integrated 37 language packs into a EN-US iso
ended up with 38 language iso image can choose what language to install from start of installation
https://www.mirrored.to/files/JMJZUG1T/NTLite_log_intergrate_1903_language_packs.log_links
Last edited:
Kasual
Well-Known Member
going to make windows RTM 1903 versions today with 1903 language packs..
all went well first time this time..
but with all 1903 files..
for those wanting to view the log file...
Site: https://www.mirrored.to
Sharecode: /files/JMJZUG1T/NTLite_log_intergrate_1903_language_packs.log_links
You can attach the log file or put the direct link..
Why do you split the link?.
Kasual
Well-Known Member
Thanks but i just wonder why, never mind.@ Kasual fixed link for you.. its whole again
Also (the next time) you can use the button "Attach" right under the typing field to attach logs or presets (xml), quicker and easier.
Right now there are minor issues regarding 1903.
These language packs do not work. I tested them. I have official language pack iso on my drive. Here you go:Всем здрасте!
Линки только на 10.0.1803
Может кому понадобятся Microsoft-Windows-Client-Language-Pack _ *. Cab архивы в таком виде:
mu_windows_10_language_pack_version_1809_updated_sept_2018_x86_x64_arm64_dvd_f17c743a
mu_windows_10_language_pack_version_1903_x86_arm64_x64_dvd_c45a68ac
(Это извлечённые в папках * .iso образа и залитый на облачном моё хранилище Яндекс.Диск
В наличии имеются цифровые подписи от Microsoft в свойствах файлов * .cab архивы можно сделать выводы, что эти пакеты являются подлинными).


Hi all
hello I am a beginner in this, I have an iso 1903 but it is in English I would like to implement the Spanish and Portuguese language, how do I extract the languages of this ISO?
These language packs do not work. I tested them. I have official language pack iso on my drive. Here you go:
hello I am a beginner in this, I have an iso 1903 but it is in English I would like to implement the Spanish and Portuguese language, how do I extract the languages of this ISO?
Find the appropriate cab file for your target OS. Then using winrar or other program you can extract.Hi all
hello I am a beginner in this, I have an iso 1903 but it is in English I would like to implement the Spanish and Portuguese language, how do I extract the languages of this ISO?
I did not compare the hash files. I downloaded proper language pack from your links. I integrated them to my wim file and they did not work. I do not know if the integration process was faulty but what i know is the cab files that are extracted from the ISO file worked perfectly. I was not a very big fan of downloading 5.5 Gigabytes of an iso file for a 46 mb cab file.SWATcyp
First you would compare the hash sums of files (* .cab archives) from your * .iso-image with files that I have on the link above, and then you would write that there "works" or "does not work"
I gave a link to the same thing that you have in * .iso, only I have on Ya.D. the same image in unpacked form.
P.S.
And by the way, everything works there.
You can see for yourself, here (as an example) integrated Microsoft-Windows-Client-Language-Pack_x * _en-us.cab into Russian install.wim images:
install_10_1903_11in1_origin_RU-EN.wim
I shared the iso file few posts above.where is language pack files for 1903?
freMea
Member
I suggest adding a reliable method that use the uupdump.ml online service to download all language packages and features and follow this method to integrate them in NTLite.
Will review freMea's post and update this topic accordingly, there is a complication. Thanks.
OK, this is the most effective, surefire way I've found so far:
1 - Open NTLite, mount the image you want language packs for. After it finishes mounting the image, you'll see something like 'Windows 10 Enterprise LTSC 2019 (1809) x64 - Client 17763.107' This last number is the build numbe and the information we need.
2 - Go to https://uupdump.ml/ and look up your build number. A list of image links will show up, select one of the correct architecture.
3 - You'll be redirected to a language selection page, select the language whose packs you need, not the one from your base image. Click next, select 'all editions' from the list and click next again.
4 - Now click "Browse a list of all files" instead of any download options. You'll be redirected to a list with all the files on the image, the language packs are in there, somewhere. Click the names to download any you need, and before you leave, copy the section named 'rename script' at the end.
5 - Create a script (.bat or .cmd file) on the same directory of the files you downloaded, and run it to turn the unknown file types into proper cabinets.
6 - Now, go to your image directory and look up for the NetFX package, under Sources\SxS. You'll find a file named something like 'microsoft-windows-netfx3-ondemand-package~31bf3856ad364e35~amd64~~'. Copy that sufix after the first tilde, something like "~31bf3856ad364e35~amd64~~" and paste that at the end of the name of EVERY language pack you download.
7 - Move those to NTLITE install 'directory\updates\10.0.[your version number i.e. 1909].[Architecture i.e. x64].FOD'
And you're done. the Language Packs should now install without issues under NTLite. For some reason they are not activated under IME after the system is installed (M$ policies on needing you to connect to the mothership at least one, would be my guess), but they should integrate into the image successfully.