How does NTLite fake Setupcomplete.cmd with an OEM key?

good day,

i am looking for an information how NTLite does run the SetupComplete.cmd when using an OEM key.
I read in another post this is done via the OEM way (OEM setup complete).

https://www.ntlite.com/community/index.php?threads/post-setup-steps-are-not-working.2902/

unfortuanly i cannot find "OEM setup complete" in the unattended toolbar.
Is this because i am using the free license?

How does this look like in autounattend.xml file?
My assumption was this is done via running a cmd.exe pointing to the SetupComplete.cmd
Code:
 <settings pass="oobeSystem">
  <component name="Microsoft-Windows-Shell-Setup" [...]
   <OEMInformation>
   <RunSynchronous>
    <RunSynchronousCommand wcm:action="add">
     <Order>1</Order>
      <Path>cmd.exe /c "%WINDIR%\Setup\Scripts\SetupComplete.cmd"</Path>
     </RunSynchronousCommand>
   </RunSynchronous>
  </OEMInformation>
 </component>
</settings>
Is this correct or how can i achieve that?
I do not want to fall back into the XP time with RunOnce registry :)

thanks for any hint,

greetings from Germany
 
Last edited:
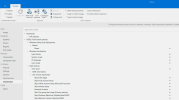
OEM SetupComplete is available on free editions. Enable Unattended mode (even if you don't use any other settings).

1699291370492.png

NTLite does it by creating a RunSynchronousCommand during specialize pass.

Technically it's not exactly the same thing, because specialize pass is executed before OOBE. Anything that requires OOBE to be completed will be broken, but at a high level it's the same result. The OEM restriction is enforced by MS as part of their volume licensing agreement with vendors.
 
Thank you for the verification.
So technically the above snipped needs to look like that:*
Code:
<settings pass="specialize">
        <component name="Microsoft-Windows-Deployment" processorArchitecture="amd64" [...]    
        <RunSynchronous>
                <RunSynchronousCommand wcm:action="add">
                    <Order>1</Order>
                    <Path>%WINDIR%\Setup\Scripts\SetupComplete.cmd</Path>
                    <WillReboot>Never</WillReboot>
                </RunSynchronousCommand>
            </RunSynchronous>
        </component>
    </settings>

I will try this and give feedback, ty for the quick help.

* the component string has been shortened
 
Congratulations, you passed the test. Here's NTLite's basic unattended file for using OEM SetupComplete.
 

Attachments

  • autounattend.zip
    706 bytes
Maybe investigate and make use of First Boot Experience keys
Code:
; enable built-in Administrator
[HKEY_LOCAL_MACHINE\SYSTEM\Setup\FirstBoot\PreOobe]
"00"="cmd.exe /c powershell -ep unrestricted -nop -c \"Set-CimInstance -Query 'Select * from Win32_UserAccount WHERE SID LIKE ''S-1-5-21-%-500''' -Property @{Disabled=0}\" &exit /b 0 "

; run setupcomplete.cmd
[HKEY_LOCAL_MACHINE\SYSTEM\Setup\FirstBoot\PostOobe]
"00"="cmd.exe /c C:\\Windows\\Setup\\Scripts\\setupcomplete.cmd &exit /b 0 "
 
Last edited:
Maybe investigate and make use of First Boot Experience keys
This workaround is excellent in two aspects:

1. Doesn't prevent the user from providing their own autounattend.xml. The normal fix requires inserting a RunSynchronousCommand or Microsoft-Windows-Deployment block, and checking if you need to shift <Order> for other commands.

2. Moves the execution time out of specialize and back after OOBE, where it's normally expected to run.
 
The Installer ran into an issue an complained about a broken unattend.xml.
Unfortuanly i cannot determ which line causes an error, setupact.log only says:


Error in pass specialize, component Microsoft-Windows-Deployment
I assume it complains about the percent symbol "%" and i need to quote it.
Code:
<RunSynchronousCommand wcm:action="add">
                    <Order>26</Order>
                    <Path>%WINDIR%\Setup\Scripts\SetupComplete.cmd</Path>
                    <WillReboot>Never</WillReboot>
</RunSynchronousCommand>

The overall goal is to start unattended setup over the network and SetupComplete should trigger this.

abbodi86
Why do you use powershell to enable the built in Administrator?
Wouldn't
Code:
 cmd.exe /c net.exe user administrator /active:yes
fit as well?

Not quite sure: If you use cmd.exe /c then &exit /b 0 should be obsolete


EDIT:
Ii think i got it: If the administrator account has a different name.... :)
 
Last edited:
There are tools older than it and some are useless still around, but they want to force powershell down the throat
 
OMG, i will go back to BIOS/Legacy boot.
How the heck do i get this prepared image onto an USB stick?

If i format it with NTFS or exFat it cannot UEFI boot

If i format it FAT/Fat32 the install.wim cannot be copied (>4GiB)
splitting the wim is no longer supported

Using Rufus with FAT32 and NTFS or exFAT breaks SecureBoot (as the Rufus NTFS driver is not signed)

seriously MS? I checked how MS does it via MediaCreation tool, it's cheating and using the install.esd
 
Last edited:
would this be enough?
; run setupcomplete.cmd [HKEY_LOCAL_MACHINE\SYSTEM\Setup\FirstBoot\PostOobe] "00"="cmd.exe /c C:\\Windows\\Setup\\Scripts\\setupcomplete.cmd &exit /b 0 "

or it needs built-in administrator to run setupcomplete.cmd as admin?
 
Last edited:
Using Rufus with FAT32 and NTFS or exFAT breaks SecureBoot (as the Rufus NTFS driver is not signed)
Rufus' bootloader is signed by MS, and has been for two years. Unless your UEFI is really old, it works with SecureBoot.

The upcoming hurdle is the BlackLotus UEFI mitigation requires revoking the BIOS whitelists to lock out the pre-May 2023 Windows bootloader (which has been cracked). This step bans legacy Windows and non-Windows bootloaders, so everyone has to resubmit for UEFI standards org re-certification. Rufus is in a bind, since it cannot redistribute the new bootloader (owned by MS) from W10/11 May 2023 or 23H2 ISO's.

seriously MS? I checked how MS does it via MediaCreation tool, it's cheating and using the install.esd
Using ESD format is a normal practice to reduce ISO size. NTLite can convert your image, from the Apply or Image screens. It doesn't default to saving to ESD, because you can only edit images while in WIM format. Converting back and forth is a hassle, and should be reserved for when your image testing is done.
 
Didn't Microsoft added support for UEFI booting from NTFS USB in W10 v1709 or so?
---

would this be enough?
; run setupcomplete.cmd [HKEY_LOCAL_MACHINE\SYSTEM\Setup\FirstBoot\PostOobe] "00"="cmd.exe /c C:\Windows\Setup\Scripts\setupcomplete.cmd &exit /b 0 "

or it needs built-in administrator to run setupcomplete.cmd as admin?

it's enough
the "enable built-in Administrator" is just an example to use PreOobe key
 
How did you include the above reg file?
I itried to be smart and added it to RunSynchonousCommand:
Code:
<RunSynchronousCommand wcm:action="add">
<Order>8</Order>
<Path>reg.exe add "HKLM\SYSTEM\Setup\FirstBoot\PostOobe" /v "00" /t REG_SZ /d "cmd.exe /c C:\Windows\Setup\Scripts\setupcomplete.cmd &exit /b 0 "</Path>
 </RunSynchronousCommand>

it took me the whole week to figure out why this fails, the "&" needs to be escaped in XML files: &amp;
 
Last edited:
That reminds me, i pasted plain command format as registry data, which need to double the backslash in setupcomplete.cmd path to work as .reg file
updated
 
I think best way for me would be
Code:
regedit.exe /s "C:\Windows\Setup\Scripts\regtweaks.reg"
as a RunSynchronousCommand.

I think this is easier to populate via $OEM$\$$\Setup\Scripts path then opening the WIM image.
Even later on modifications

Thoughts?
 
Back
Top