When a WIM file with two or more images is created, normal compression will "de-duplicate" identical files to reduce the image size. If you convert the final image to ESD format, it may get even smaller.
De-duplication works best if all of the multiple images are from the
same Windows version. Most of the files for Home, Pro or Enterprise are identical across the different editions.
1. Download a clean ISO. Load the install.wim.
2. Export one of the editions, for example W11 22H2 Pro. Right menu ->
Export -> WIM -> NEW.wim
3. Export the same edition (again), and save to the same WIM file.
NTLite will ask if you want Yes to Overwrite, or No to Append. Choose Append.
4. Load the new WIM file. You now have two copies of the same edition.

5. Select one of the two copies. Right menu ->
Edit -> Name -> "Windows 11 Pro without Defender"

6. Load this renamed image, and remove Defender from Components. After applying your changes, replace the original
sources\install.wim file in the ISO folder with this updated WIM file. From the
Image screen, click the Refresh button on the toolbar.
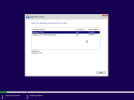
7. Load any of the two install images. If you're using
Unattended mode, check the Toolbar box for "
Prompt edition selection". Otherwise you won't be allowed to select which image to install whenever using Unattended mode.
8. From the
Apply screen, change the image format to ESD compression. Apply changes.

Code:
02/07/2025  09:32 PM     3,643,622,486 install.esd
               1 File(s)  3,643,622,486 bytes


